Scrapbook Layout: 10th Wedding Anniversary

10th Anniversary Scrapbook Layout by Natalie Parker

The Story:  We celebrated a big one this year!! 1-0!

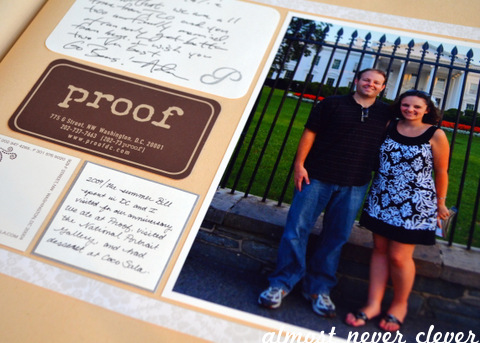
One scrapbook page for every anniversary:  We take a picture on each of our anniversaries and I turn it into a scrapbook layout and add it to the end of our wedding scrapbook.  I love how the scenery changes and we have changed over the years.

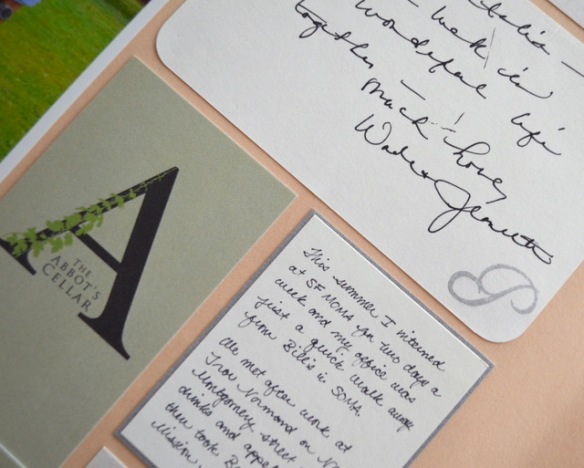
Guest book cards: As usual, I picked one “guest book card” that was signed by a wedding guest and included it on the page.  Read more about why we used guest book cards here.

More to scrapbook later: I have more pictures of our party and more thoughts that I will likely put into our 2016 scrapbook.  This page is to simply mark the year and matches all of its compadres in the Anniversary section (see below).

Previous Years:  Anniversaries 1-6, Anniversary 7, Anniversary 8, Anniversary 9.

Want to see my entire wedding scrapbook?  Check it out here.

10th Anniversary Scrapbook Layout by Natalie Parker

Fonts: Garamond | Tools: Epson Stylus R2000 (photo), Silhouette SD (headline) | Supplies: Epson Semigloss Photo Paper (photo), DCWV Silver & Pearl Shimmer Stock, SEI White Elegance (paper) | Keepsakes Included: guest book card.

Scrapbook Layout: Ninth Wedding Anniversary

Anniversary Scrapbook Layout by Natalie ParkerAnniversary Scrapbook Layout by Natalie ParkerAnniversary Scrapbook Layout by Natalie Parker

The Story:  We celebrated our ninth wedding anniversary a couple of weeks ago.  Last year in single digits!

One scrapbook page for every anniversary:  We take a picture on each of our anniversaries and I turn it into a scrapbook layout and add it to the end of our wedding scrapbook.  I love how the scenery changes and we have changed over the years.

Guest book cards: As usual, I picked one “guest book card” that was signed by a wedding guest and included it on the page.  Read more about why we used guest book cards here.

Restaurant business card:  Also as usual, I included the business card for the restaurant where we had our anniversary dinner.  I actually forgot to grab the card after dinner (there was a lot going on that night, more on that later).  Mr. P went back a few days later and got one.

Previous Years:  Anniversaries 1-6, Anniversary 7, Anniversary 8.

Want to see my entire wedding scrapbook?  Check it out here.

Anniversary Scrapbook Layout by Natalie Parker

Fonts: Garamond | Tools: Epson Stylus R2000 (photo), Silhouette SD (headline) | Supplies: Epson Semigloss Photo Paper (photos), DCWV Silver & Pearl Shimmer Stock, SEI White Elegance (paper) | Keepsakes Included: Restaurant business card, guest book card.

On the Road to Tomorrowland

Disneyland Tomorrowland by Natalie Parker

Ten years ago today, on a beautiful February afternoon in Disneyland, he asked me to marry him.

We were in one of the passages of Sleeping Beauty’s Castle, the one that leads from Fantasyland to Tomorrowland.

When I look back on it now, I smile and think about how appropriate it was, on the road to Tomorrowland.  We ended up in that exact spot because he knew the castle was my favorite and the passages were the only areas where he could do it without a bunch of people staring — he was pretty nervous.

I smile every time I think of it.  That and how I couldn’t figure out why he had to go to the bathroom so often that day (he was checking for the ring in his pocket after every ride).

See how I scrapbooked our proposal story here in my wedding scrapbook.

scrapbook layout: eighth anniversary

Anniversary Scrapbook Layout by Natalie ParkerAnniversary Scrapbook Layout by Natalie ParkerAnniversary Scrapbook Layout by Natalie ParkerAnniversary Scrapbook Layout by Natalie Parker

Another year for us has passed and it’s time for me to make a new scrapbook layout to remember the day we were married.

The Story: Every anniversary we take a picture and I make a new layout to go in the wedding scrapbook.  More on the process here.  I include the business card for where we ate dinner plus a small bit of writing about the day.

Getting the Perfect Photo: I was smart this year and tried to break reminded myself how to use the tripod the night before.  The best photo of us had a guy running through it on the side of the frame.  I removed him by clipping out a piece from one of the other photos.

Guest Book Cards, Remembering those who have Left Us: Every year, I choose one of the messages our friends and family wrote to us on our wedding day and include it in the new layout.  In the last couple of years, I’ve chosen the card from someone who has since passed away.  It hasn’t been that long since our wedding day and I’m struck by how quickly people can leave us and how quickly time marches on.  I’m glad I can record something from them.

Previously: See layouts for anniversaries one through six here and number seven here.

Anniversary Scrapbook Layout by Natalie Parker

For more information on the rest of the book and supplies, visit my Wedding Scrapbook Page

Fonts: Garamond | Tools: Epson Stylus R2000 (photo), Silhouette SD (headline) | Supplies: Epson Semigloss Photo Paper (photos), DCWV Silver & Pearl Shimmer Stock, SEI White Elegance Tiara | Keepsakes Included: Restaurant business card, guest book card.

Follow my blog with Bloglovin

Scrapbook Layout: Wedding Scrapbook, 7th Anniversary Layout

7th Anniversary Scrapbook Layout by Natalie Parker7th Anniversary Scrapbook Layout by Natalie Parker7th Anniversary Scrapbook Layout by Natalie Parker7th Anniversary Scrapbook Layout by Natalie Parker7th Anniversary Scrapbook Layout by Natalie Parker7th Anniversary Scrapbook Layout by Natalie Parker

Seven years.  Feels great.

What also feels great?  Being done with the Wedding Scrapbook.  I put the page together in one evening and added it to the book.  I love having the page design already decided!

This is the same design as the rest of my anniversary scrapbook layouts.  I took our new picture and paired it with the business card from the restaurant we ate at plus another of our guest book cards.

Mr. P is such a good sport and got up a few minutes early so we could take our picture before work.  We’ve been married long enough that he’d rather get up early without complaint instead of risking hearing me fret for the rest of our lives how I didn’t get a good picture.

I’m so happy that I decided to start taking pictures on our first anniversary and that we’ve kept it up.

7th Anniversary Scrapbook Layout by Natalie Parker

For more information on the rest of the book and supplies, visit my Wedding Scrapbook Page

Fonts: Garamond | Tools: Epson Stylus R2000 (photo), Silhouette SD (headline) | Supplies: Epson Semigloss Photo Paper (photos), DCWV Silver & Pearl Shimmer Stock, SEI White Elegance Veil | Keepsakes Included: Restaurant business card, guest book card.

Big Box of Wedding Stuff – Part 2

Purging Wedding KeepsakesRight before I started this wedding scrapbook, I organized and showed you the big box of stuff I’d saved from the wedding.  I’ve scrapbooked the wedding.

You know what that means.  The box’s time has come.  It was the hard part and the easy part.

On the one hand, I was itching to clear out the box because I didn’t need the stuff in it anymore.  On the other hand, I spent hours hand making a lot of crafts in that box and am attached to them.

I had to keep reminding myself of the all important rulewhat doesn’t make it into the scrapbook goes buh-bye.  The important stuff is in the scrapbook – that’s the point of the scrapbook.

A lot of what I got rid of were duplicates of things already in the book – extra favors, programs, table decorations, etc.  It was still hard but I did it!  I kept the rest of our response cards so I can make them into notecards.  I also kept extra invitation envelopes to use with other stationary.

It’s all gone.  Thrown out, recycled, reused, repurposed.  I’m really glad to see that empty box.

Scrapbooker’s Guide to Choosing a Wedding Photographer

A Scrapbooker's Guide to Choosing a Wedding Photographer, by Natalie ParkerPictured above: Mr. P and I working with our wedding photographer.  I thought it would be helpful to share my thought process in picking a wedding photographer.

Note: this posts assumes photos are important to you and your wedding.  I always tell people to think about what thing/purchase at their wedding is most important to them and splurge on that in proportion to other things.  For me it was photos.  If you are reading this, you are probably a memory keeper and photos are probably important to you too!

Get someone who can pick up the little details.  I went with someone who was good at getting people and things.  If you scrapbook, you understand how important little details and closeups help you remember and help the design of the page.  The hardest pages to lay out for me where the ones where I had tons of people photos but no detail.  My photographer got details like our centerpieces, my DIY projects, our wedding rings, closeups of hands zipping me into my dress, and much more.

Work with someone who is willing to tailor a package to your needs.  There are lots of photographers out there and you should find someone who is willing to sell you exactly what you want to buy.  Sometimes it will be a package they already have, sometimes not.  Once I decided what I wanted, I emailed photographers initially to introduce myself and find out if they were willing to customize their offering.  If they were and it was in my budget, I set up a meeting.  If not, I thanked them and moved on.

Get the photos digitally.  All of them.  I got every single photo my photographer took on a DVD.  Every single one.  This is what I meant by negotiating for what you want.  At the end of the day, I knew I was going to make my own wedding scrapbook.  I didn’t want an album with 25 pictures in it and I wanted to be able to create gifts for family using the photos.  I paid my photographer for her time and for the DVD.  Keep in mind, not ordering an album and getting a DVD instead isn’t necessarily cheaper.

What do I mean by all of the photos?  Sometimes, a “DVD of photos” in a photography package usually includes 300 or so photos that the photographer picks and touches up.  For most people, that works.  I’m not most people and I’m pretty neurotic about photos.  My photographer gave me the 300 she touched up and then another set of 1000 that were untouched.  I’m so glad I got everything.  Her work was beautiful and there were some moments that didn’t make the “cut” of 300 that I’m glad she got (like the picture of me in the mirror).

Getting a photo DVD is somewhat controversial and that is understandable.  Photographers make money off of prints and albums.  That’s why I paid my photographer heftily for our arrangement.  If a photographer isn’t okay with this, that’s totally cool and it’s perfectly okay for them to stick with what’s good for their business.  I researched a lot of photographers until I found what I needed.

Make a list.  This is good advice for scrapbookers and non-scrapbookers alike.  There are lots of important pictures to get.  Your photographer isn’t going to know who is important to you.  I made my photographer a list of every family photo we wanted to get*.  It was nice knowing at the end of the day that we didn’t forget anything.  Since I DIYed a bunch of elements for the wedding, I listed those too so she could get pictures of the final product.

Strong Communication.  In addition to the list above, be up front with your photographer about what you want.  There were some cliche shots I didn’t want but other things, such as a group photo of all wedding guests, that I wanted to make sure to get.  We planned together when the best time would be to get it.

This is what worked for me and I hope it is helpful for you!  Above all, make sure to get what you think you will need and use.  Don’t get a DVD with a thousand pictures on it if you will be perfectly happy with an album.

*I may or may not have included mug shots of each family member so the photographer could help round people up when it was their time for pictures.

Do you have any suggestions? Think I’m totally of base?  I would love to hear your tips in the comments!

A Scrapbooker's Guide to Choosing a Wedding Photographer, by Natalie Parker

Deleting My Wedding Pictures

Deleting wedding picturesI got your attention with that headline, didn’t I?

I’m talking about some of my wedding pictures, not all of my wedding pictures.

Now that I’m done with my wedding scrapbook, I’m itching to get some hard drive space back.  You see, my wedding pictures took up around 7 gigs of space.

Let’s get this straight:  I still have the master DVD of all wedding pictures from my photographer.  That is in safe storage.  I figure by the time the DVD goes bad I probably won’t be that attached to 7 gigs of pictures.

I don’t need every single wedding picture on my hard drive.  I have every single picture my photographer took.  That means I have six different versions of the same wedding party picture.  Four versions of a large family picture.  You get the idea.

I went through all the pictures, kept the best version of everything and deleted the extras.  I took it down to just over 2 gigs.  Those 2 gigs I’m keeping on my hard drive, my external hard drive, and backed up on SmugMug.

How did I end up with that many wedding pictures to begin with?  I’ll be sharing that and other thoughts about wedding photographers later on in the week.

Wedding Scrapbook Finished

Finished Wedding scrapbookIt’s official, I’m declaring it – the wedding scrapbook is finished!

It took me over a year to finish.  That’s a lot to think about, really.  I’m not sweating it and am actually pretty proud of myself because most weeks I only had a couple hours to devote to it and there were times like this and this where I was away for weeks.

It’s all bound together, the entire story starting with our engagement, all of the wedding planning, dress shopping, bridal showers and rehearsal.  The wedding itself is very detailed, capturing all the moments and all the keepsakes: the invitation, program, menu, favors, and more.  I documented all the places we visited on our honeymoon and finally, every wedding anniversary.

It will never actually be finished, of course.  Every year after our anniversary, I’ll add a new page with our picture, one of our guest book cards, and some thoughts.

It took me five years to start it.  I’m not upset about that at all.  Sometimes I think we beat ourselves up too much about not having time to get to a creative project.  It’s a creative project, you’re supposed to enjoy it.  It’s never too late to start something.  Don’t worry about whether it’s the right time.

Finished Wedding scrapbookI actually finished the final page late in the evening.  Wanting to bind the whole thing together so badly, I sat at the scanner for a half an hour scanning the final layouts for the blog.  Mr. P, ever the perfect husband, stayed up way past his bedtime to flip through the bound finished product.

Finished Wedding scrapbookTo see all of the pages in my wedding scrapbook, visit my wedding scrapbook page.

Scrapbook Layout: Wedding Scrapbook, Anniversary Pages

Wedding Scrapbook Anniversary PageWedding Scrapbook Anniversary Page HeadlineWedding Scrapbook Anniversary Page Detail CloseupWedding Scrapbook Anniversary PageWedding Scrapbook Anniversary Page HeadlineWedding Scrapbook Anniversary Page

Well, we’re here!  This is it!

One page for each anniversary.  Seems simple enough?  You bet.  The design will be the same every year, with a slight variation depending on what side of the page it’s on.

I only stressed about the design a tiny bit (yeah, right).  Picking a design I’ll use for all the years of our marriage caused me no stress at all.

What’s on Each Anniversary Scrapbook Page

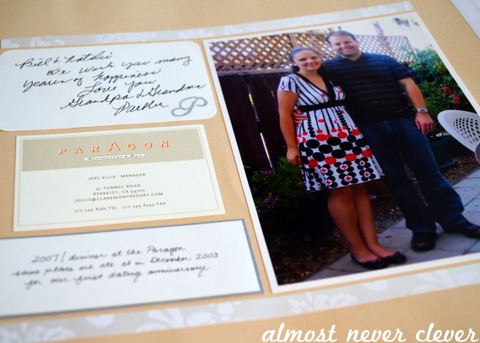
5×7 Anniversary Photo: We take a photo each year on our anniversary (way back on our first I had us take a photo and had no idea what I would use it for).  The photo is always vertical and is taken either at home or where we happen to be if we are traveling.

A guest book card: I pick one of the guest book cards and add it to the page.  I like how putting them here makes them individually important and I like reading wishes for our future next to our anniversaries.  When I run out of those, I’m going to start using cards we got with wedding gifts.

Business Card from Restaurant: I collect a business card for the restaurant where we ate dinner that night.  Sometimes they’re easy to get on the host stand, sometimes I have to ask for them.  Mr. P is a pro and will remind me if I forget.

Notes: I write the year and pen a few thoughts about the day or where we were.

Patterned paper borders: I use leftover patterned paper from the wedding scrapbook to frame each page.

Anniversary number cut with Silhouette: This goes on the bottom corner of the page and is Garamond in italic.  I admit, I didn’t think this through very well.  I don’t think “twenty-seven” and other long numbers are going to fit on the page at that font size.  I can’t go smaller because italic serifed fonts are very difficult to cut out on the Silhouette.  I might switch to numerals at our 10th.

So that’s it, kinda.  Each year after our anniversary I’ll post the new layout here before I add it to the album!  I’m so excited to be able to revisit this project every year and see how we have changed.

Wedding Scrapbook Anniversary PageWedding Scrapbook Anniversary PageWedding Scrapbook Anniversary PageWedding Scrapbook Anniversary Page

To see all the pages of my wedding scrapbook so far and to learn more about the papers I’m using, visit my wedding scrapbook page.