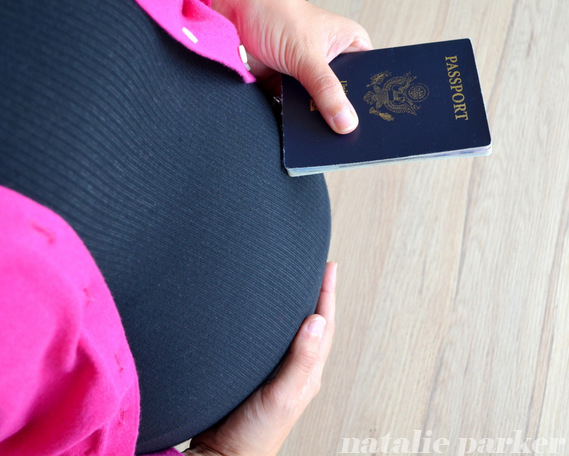
How to Get an Infant Passport

Infant Passport How to by Natalie Parker

Little T received his passport at 5 weeks old!  We already have a trip planned.  Getting an infant passport is detailed, but not difficult.

How to Get an Infant Passport

Visit the State Department website for instructions on minor passports.  Don’t take my word for it or any other blogger.  This site will have the most current requirements.

Again, it’s detailed but it’s not hard.  Read the information carefully and follow the steps.

State Department Step List

Important Things to Note

What you need to start the process: the birth certificate and the Social Security Number. We were at the city records office the first day the certificate was available and had the passport application filled out the moment Little T’s Social Security card arrived.

Same cost as adults but only 5-year validity.  Bummer, I know but those are the rules for minors.

Two forms of payment due.  You have to pay the State Department for the passport plus the facility that’s accepting your application, whether that is a post office or somewhere else.  You can’t write one check for everything.  The application wizard on the State Department site (called “Form Filler”) will tell you what you need to pay.

State Department FAQ

The child must appear when you apply.  You cannot file the application by yourself.

BOTH parents must appear to apply or you must have special documentation.  See the State Department site for details.  In most cases you will need a notarized form from the other parent or court documents if you have sole legal authority.  This is to make sure one parent isn’t taking the kid out of the country without the other’s consent.

Special rules for infant pictures.  Visit the State Department site for details.  But note that infants do not have to be looking directly at the camera, nor do their eyes have to be fully open.  Sometimes passport photo places don’t know these rules.

You can take the picture yourself.  Visit the State Department site for details and a video.  Check out these handy instructions as well.  We took Little T’s picture ourselves — we got a white sheet for his crib for this reason.

You can do it!  Even if you don’t have a trip planned, a passport is a handy thing to have.  Feel free to ask any questions in the comments!

How to Book an International Trip for an Unborn Lap Infant

Booking Unborn Infant Travel by Natalie Parker

We took the plunge and booked a trip to Europe when Little T was still camped out on my belly.  How does one even do this?  Aside from the logistics, Why would anyone ever do this?

What Were We Thinking?

We’re not going to stop traveling.  This is an important goal for our family.  If something is important to us for our new family life, it’s worth putting in the effort even though it will be hard.

A lump instead of a handful.  We hear people wish they had traveled while the baby was under 6 months.  They felt it would have been easier than when the baby is older and needed to be entertained more.

Booking before we change our minds.  Parents wish they had traveled earlier on, they also could not have imagined planning a trip while taking care of a newborn.  We decided to eliminate this issue by planning ahead of time because . . .

We can cancel if we want to.  Get travel insurance.  You can plan without worry of losing money.  We’re treating this like travel during my pregnancy — plan first and cancel later if we just can’t go.  If our son has health problems of any kind, we can cancel.

Lap Infant Fees

Lap infants are NOT FREE on international trips.  They must be added to the reservation and paid for.

Different airlines have different fees.  Some are a flat fee, some are a percentage of the fare, etc.  Here is a great chart that shows some of the different rates.  Check directly with the airline before booking.

Wait, the baby doesn’t have a name or birthdate yet.  We booked this before he was born and called back to add him later.  The fee was 10% of the adult revenue fare at the time we added him, so it’s important that we didn’t wait long.  I’ve heard some nightmare stories of people having to pay lap infant fees the day they get to the airport and having it be a percentage of the walk up fare.  Don’t do this!

Traveling While Pregnant by Natalie Parker

Nuts and Bolts

We’re insuring the trip to cover non-refundable costs.  We’re doing this the same way we used travel insurance during the pregnancy.

The baby can’t be insured until he’s born.  We called after he was born to add him to our policy.  We had to buy the policy before he was born so we could have “cancel for any reason” coverage.  For more on this, click the link above.

Padding our itinerary.  We’ll be in two countries and a handful of cities.  We’re researching and guessing about how much time we can spend in different places and how much movement the Little T can handle.  We’re adding more time in each place than we normally would so if we have a complete meltdown day, we won’t lose all our time there.

Do We Regret this Now that We’ve Had the Baby?

No. I’ll be honest, there are many difficult moments when we wonder, “what were we thinking?!”  But as dust as somewhat settled, we’re really glad we have the trip to look forward to.

It’s giving us a goal to get used to getting out of the house instead of sitting around.  There’s no way we can take a baby that’s been a homebody to Europe — we’ve been practicing taking him around town and he’ll have two short trips before the big one.

There’s no way we would have made these reservations after he was born. We were right. I can’t imagine trying to make these plans while sleep deprived.

Stay tuned!  We’ll report back and let you know how it goes!

I’m a Mom

Back in April, exactly a week past his due date, our son Teddy made his way into the world.  He’s officially the cutest thing I’ve ever seen.

We’ve been adjusting to our new life as a family of three and I’m not afraid to admit it’s been very difficult at times.  We’re plugging along and it’s truly a joy to see him learn new things.

I’ve been carving out little bits of creative time where I can.  I’m looking forward to showing the rest of my pregnancy album — the insides are finished and I’m starting to bind it!

I’m also looking forward to sharing what it’s like traveling as a family.  Teddy isn’t yet three months old but has five planned plane trips already!  Feel free to join me on Instagram for more timely updates.

How to Day Trip to Stonehenge from London

How to Visit Stonehenge by Natalie Parker

On our way into London from Bath, Mr. P and I detoured at the last minute to Stonehenge.  It’s pretty close to London but we’d never gotten around to visiting before.  Since it wasn’t raining, we went for it!

We figured this all out on the fly from our hotel in Bath.  You can get yourself there pretty easily without a tour!

This posts assumes you don’t have a car.  If you have a car, you can drive yourself to the visitor’s center and even see Stonehenge itself from the freeway.

The Basics

Stonehenge is just outside Salisbury, which is about 1.5 hours by train from London.

You have to get yourself to Salisbury, then to the visitor’s center, which is outside the town.  From there, there is a free shuttle from the visitor’s center to the stones.

Despite what we read online, mud wasn’t an issue.  The paths around the stones were covered and even though it was damp outside (is it ever not?), we had no trouble walking around.

How to Visit Stonehenge by Natalie Parker

Train to Salisbury

Trains leave London’s Waterloo station fairly regularly and serve Salisbury directly.  You can buy tickets online ahead of time or simply wait until you get to the station.  Waterloo station is also on the tube line and easily accessible from other parts of London.

Play around with the train website to understand times and costs.  Costs vary depending on whether you are traveling during a peak commute time.  It’s not cheap.  A one-way ticket from Salisbury back to London on a weekend (off-peak) cost Mr. P and I £40 each.

To the Visitor’s Center

The visitor’s center is outside of Salisbury.  Annoyingly, there is no public transportation from the train station to the center.  Here are your options:

Take a cab.  This can be more cost effective if you have a group of 4.  We considered this so we could make our visit quick, but we were worried about finding a cab for the way back.  We have heard of groups of 4 negotiating a flat rate with the taxi to drop them off and take them back after the visit.

Uber or Lyft?  We also considered this but did not see any cars available when we arrived in Salisbury.  We were there in January, so this may be an option if you are visiting at a peak time.

Take the Stonehenge Tour Bus.  We ended up going this route and were honestly a bit annoyed that the tour bus has a bit of a monopoly on getting to the visitor’s center.  It leaves from the train station and makes several stops on the way.  If you are interested in seeing other sites including the Salisbury Cathedral, this is a great option.
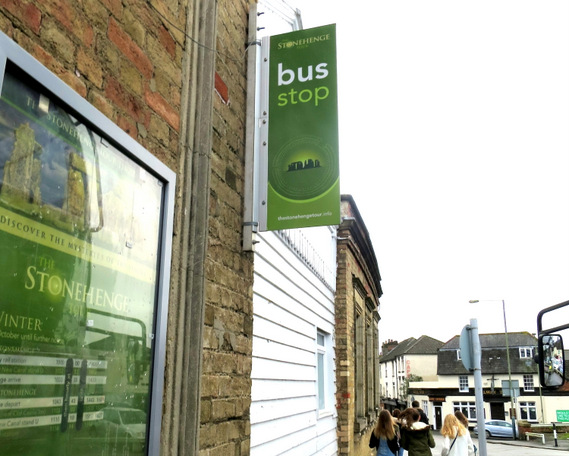
How to Visit Stonehenge by Natalie Parker

More on the Stonehenge Tour Bus and Buying Your Stonehenge Tickets

Buy bus tickets online or the day of.  We were able to buy our tickets with a credit card from the driver upon boarding.

The Tour Bus sells Stonehenge tickets as well as tickets to other sites.  See their website here for a complete listing of what’s offered.

Should you buy your Stonehenge tickets on the bus or through the official site?  If you’re traveling in the low season like we were, it’s easy and cost effective to just buy your bus ticket and Stonehenge ticket from the bus driver.  If you’re going during a busy time, you should consider buying your ticket early from the official site to make sure they don’t run out.

The bus comes with an audio guide for the ride and great views of the town.  Even though we were trying to keep our visit short and were a bit annoyed about having to stop at sites we weren’t visiting (I was pregnant and tired), the views from the top of the bus were great and I’m glad we got to see the town.

How to Visit Stonehenge by Natalie Parker

When You Get to the Visitor’s Center

Collect your tickets if you didn’t buy from the bus.  We bought our tickets ahead of time along with a guidebook and pickup was really easy.

The visitor’s center is really nice.  Bathrooms are new and plentiful and there’s a cafe serving locally sourced food.  We had lunch there and really enjoyed it.

A free shuttle takes you from the center to the stones.  It leaves every few minutes from right outside the cafe.

Free Wifi.  The visitor’s center has free wifi!

Free downloadable audio guide.  Instead of checking out an audio guide, we used the wifi to download the official Stonehenge free audio app.  Find it here on the Play Store for Android and here on the App Store for iPhones.  Download before you get on the shuttle bus and listen using your own device.

What if you have luggage?

There are no left luggage facilities at the Salisbury train station or at the Stonehenge visitor’s center.  There are no luggage restrictions at Stonehenge as of this writing so theoretically you could take your suitcase.  However, dragging a suitcase around sucks.

We left our luggage at the Cat Tavern near the train station.  We read about this online and decided to go for it.

The Cat Tavern is a pub that will store luggage for £4 per piece (cash only) per day.  They will not store luggage overnight.  It’s a bit unconventional but it worked.  Keep the handwritten receipt to claim your luggage!  We stored two suitcases and carried a backpack with our electronics to Stonehenge.

Here’s a map.  Exit the station and turn left.  The tavern is just down the road on the right side of the street.

Other Sites in Salisbury

There are other noteworthy sites in the area that are worth a wander if you have a day.  I don’t necessarily think an overnight is necessary, but if we had more time, we probably would have poked around town and visited the cathedral.  Salisbury wasn’t bombed during World War II (the Luftwaffe used the cathedral as a way point), so a lot of the buildings in the town are really old and interesting to look at!

Pregnant and Traveling: London at 7 months (How’d it go?)

Pregnancy Travel by Natalie Parker (1)

I wrote earlier about booking a business trip to London for when I was 7 months pregnant.  Check out that post for everything I considered when booking.

How’d it go?

It was fabulous.  My pregnancy was not an issue during the trip and I’m so glad we went.  I cannot stress how happy I am that I made plans that I could cancel because it opened the door for me to go if I felt fine.  I felt great!

No comfort issues at all during the flights.  At that point in the pregnancy, sleeping sitting up was honestly more comfortable than lying down (I was still getting used to having to sleep on my side at night at that point).  I had no issues sleeping beyond what I’d normally feel on a flight.

Glad I didn’t upgrade to business class.  We could have done this with points.  Instead, we kept seats in premium economy.  Lie-flat business class seats would have been a waste: I cannot comfortably sleep on my side in business class even while not pregnant.  Business class lie-flat seats don’t have enough padding.

I took several copies of my doctor’s note and medical record.  I carried a note in my carry-on.  Mr. P carried a copy in his backpack and I put one in the suitcase just in case.   My doctor also printed a complete copy of my medical record for me to carry in case I had an emergency.

I didn’t get asked to prove I was fit to travel.  But I’m glad I had medical clearance with me just in case.  The flight attendants kept offering me alcohol on the flight, so maybe it wasn’t that noticeable?

Glad we went with hotels instead of AirBNB for comfort reasons.  We use both AirBNB and hotels when we travel.  I find that hotel beds are more reliable comfort-wise than beds in European apartments, so I’m glad we went with hotels here.  I was also able to have several extra pillows sent up since I didn’t pack my pregnancy pillow with me.  It helped me sleep better and made sitting up in bed more comfortable.

We didn’t do many evening activities outside of dinner.  I think this was a combination of the fact that I would get tired more easily plus that we both have west coast jobs.  We were often in our hotel room answering emails or taking calls after dinner.

We stuck close to London for weekend activities.  Honestly, I was feeling so great that if we’d found a cheapo fare to Paris or Marrakesh for the weekend, we would have done it.  But, the weather was so cold in the rest of Europe during our trip that it didn’t make sense to travel someplace cooler when we didn’t pack for it.  It even snowed on us in London!  We went to Bath and Stonehenge the first weekend and stayed in London the second weekend.

Pregnancy Travel by Natalie Parker

We did some fun kid shopping.  We visited the toy department at Selfridges and picked up a stuffed bear for the baby.  We both had bears growing up so it was a big deal picking him out!

Again, travel insurance is great and made this entire trip possible.  Read more about travel insurance for pregnancy here.

A pregnancy disclaimer:  I’m writing to share my experiences.  Your experiences, resources, and situation may be different.  My choices might not be the best choices for you.  I thank you in advance for trusting that all health decisions were discussed with my doctor and husband. 

Pregnancy Album: Weeks 17-31

Pregnancy Album by Natalie Parker

I’ve been plugging away on this album throughout the pregnancy!  I usually work on 2-3 weeks at a time to save photo paper.  But I try and do the handwritten card right after the week is over before I forget what happened.

Choosing the Cover and Colors

The cover will be made out of patterned paper: Pure Joy from Crate Paper’s Gather collection.  I grabbed coordinating cardstocks from my collection to have at the ready when I needed them throughout the album.  I’ll be using this method to create the cover and bind.

Pregnancy Album by Natalie Parker

We ended up having more ultrasounds than I originally anticipated, so I’m glad I made the album flexible and cut out the weeks and numbers ahead of time!

Weeks 17 through 31

In Week 17 we planted a new tree in our yard.  This week was the first of many during this period where I wasn’t as great at getting our bump picture in natural light.  After we got back from Hawaii (see below), I started setting a phone alarm for Saturday afternoon to remind me.

Pregnancy Album by Natalie Parker

In Week 18 my parents came to help paint the baby’s room and the entire living area of our house.  I snapped this picture of them right at the beginning of the project before we got too busy.  Week 19 covers my thoughts on election day and what it means for our son.

Pregnancy Album by Natalie Parker

In Week 19 we had another ultrasound and in Week 20 we started a series of childbirth classes at the hospital.

Pregnancy Album by Natalie Parker

Week 21 was Thanksgiving!  I got a great shot of Mr. P teaching our nephew how to make biscuits.  In Week 22 we were putting up our Christmas lights.  Since the album counts weeks rather than dates, I like having the pictures to mark the season.

Pregnancy Album by Natalie Parker

In Week 23 I got a shot of our Christmas tree and we had another ultrasound.

Pregnancy Album by Natalie Parker

In Week 24 my little sister got married!  In Week 25 we worked a ton on the accent wall in the baby’s room and I asked Mr. P to get a few pictures of me using the paint pen.

Pregnancy Album by Natalie Parker

In Week 26 we got to visit my newborn niece and had another ultrasound.  For our bump picture, I was in the middle of painting and caulking the baseboards of the built-ins for the baby’s room and was too lazy to change out of my work clothes for the picture.

Pregnancy Album by Natalie Parker

In Week 27 we were still working hard on those built-in shelves and prepping to leave for London.  In Week 28 we were in London (read more about how that went here) and I got a picture of the bear we picked out for our son at Selfridges.

Pregnancy Album by Natalie Parker

In Week 29, we finished up our time in London and made our way back home.  In Week 30, we were home for just a handful of days and then we left for a quick Hawaii trip.  I broke my streak of blank-hotel-room-wall bump pictures.  But I like that we were on the beach for this one.

Pregnancy Album by Natalie Parker

My baby shower was in Week 30 right before we left for Hawaii.  There were too many pictures I wanted to share, so I did a small layout with my favorites.  Finally in Week 31, I got a great shot of Mr. P learning how to use our new infant carseat/stroller!

Pregnancy Album by Natalie Parker

I’m having a great time with this album!  Even though it’s not bound yet, I’m already having a great time flipping through the pages.

More Information on My Pregnancy Album

Check out these posts for everything you need to know!

Planning my Pregnancy Album
Having Dad in the Weekly Bump Pictures
Album Pages: Beginning – Week 16


A Bright and Modern Baby Boy Nursery

Baby Boy Nursery Tour by Natalie Parker

I’m really proud of how our baby boy’s room turned out!  We’ve been working on it nonstop and I didn’t stop to take pictures of our projects in progress.

Is there a theme?  No.  I’m anti-theme and wanted a bright, colorful room that will grow with him.  There are stars.  There are animals.  There is travel stuff.  No one thing dominates the room.

Did I use the room as a vehicle to try every craft project on my wish list?  No comment.

Links to tutorials and products are at the end of the post.

Paint and Furniture

My parents helped us paint (1) the room a light grey with a white accent wall.  The baseboards and trim were already white when we moved in.

Baby Boy Nursery by Natalie Parker

We love the crib (2) because it’s simple and will convert into a toddler bed later.  There are plain white sheets because I didn’t think we needed more pattern and because I need a white background for his passport photo.

Modern Baby Boy Nursery by Natalie Parker

The bear (3) is pretty random, but I wanted a giant stuffed non-teddy bear for the room.  It’s actually quite difficult to search for (“wild bear?”).  The hamper is several years old and repurposed here.

The glider (4) is a recliner, no stool needed.  Mr. P finally got a recliner in the house!

I looked for an end table (5) to keep breastfeeding supplies close to the glider but also something that could double as a nightstand as he gets older.  Next to it is a small trash can (6) for non-diaper items (diapers will go in the diaper pail (7) next to the dresser).

Modern Baby Boy Nursery by Natalie Parker

I made the pillow (8) by scanning a Paris Metro Ticket, printing it on fabric, then sewing and stuffing it myself.

The rug (9) is much brighter in person than it appears online.  I passed over it until we saw it in the store.  I love the colors so much!

The dresser is Mr. P’s dresser and changing table from when he was a baby.  He sanded it down and I painted it white.  We made custom animal drawer pulls (10) using some toys and spray paint.  Finding animals the right size was challenging!

Modern Baby Boy Nursery by Natalie Parker

I lined (11) the inside of the dresser to brighten things up a bit.

Modern Baby Boy Nursery by Natalie Parker

The Constellation Accent Wall

Mr. P is a stargazer and after showing him several constellation walls (12) on Pinterest, he was sold.

He designed the wall himself and used an overhead projector to shine the drawing on the wall and trace it in pencil.  I followed with the silver paint pen, then he finished it off by adding more random stars and the Milky Way (the large band of stars).

Modern Baby Boy Nursery by Natalie Parker

The constellations are not haphazardly placed.  Mr. P used one of his favorite books (13) to place the constellations so they would appear next to each other the way they do in the sky.  I just asked for Ursa Major to be above the crib and he went from there.

Notice the dots for the stars are all different sizes.  Mr. P gave me a color-coded sheet — the larger dots are actually the brightest stars in the sky and so on from there.

Modern Baby Boy Nursery by Natalie Parker

You may notice that the constellations look a bit different than you’re used to.  Gemini (above) actually looks like a set of twins (or two stick figures holding hands).  The book is really fantastic because it uses the same stars for the constellations but draws the lines between them so they actually make sense.  Yes, it’s the same H.A. Rey who wrote Curious George.

Modern Baby Boy Nursery by Natalie Parker

The Ikea Hack Built-In Shelves

Storage is an issue in our house.  The boy’s room is pretty large and I wanted a ton of space for toy and book storage as he grows.

The shelves are from the Ikea Besta series (14) built-in and secured to the wall and trimmed with baseboards and molding (15).

Modern Baby Boy Nursery by Natalie Parker

We chose Besta instead of the Billy series because Besta shelves are 14 inches deep to Billy’s 11.  The Besta units allow us to shelve large children’s books with no problem.  The elephant is a bookend (16).

Modern Baby Boy Nursery by Natalie Parker

The 14-inch deep units also allow for great storage in the cabinet sections underneath.  I want places for toys when he gets older.  For now, we have Besta Bins (17) holding baby supplies.

Modern Baby Boy Nursery by Natalie Parker

We bought brass hardware (18) separately for the cabinet handles.

Modern Baby Boy Nursery by Natalie Parker

I’m thrilled with how the built-ins turned out.  There’s not much in them at this point but they should be able to handle a lot of stuff in the future.

Bits and Pieces

The curtains are a navy pattern (19).  In the picture below, there’s also a Nest Cam (20) hiding on one of the shelves.  There’s plenty of room for baby quilts and blankets from his grandma and great-grandma.

Modern Baby Boy Nursery by Natalie Parker

The wall above the dresser / changing area is Star Wars.

Modern Baby Boy Nursery by Natalie Parker

I bought and lightly edited an Etsy pattern (21) and framed them in embroidery hoops (22).  The project really came about because I needed something to keep me occupied but forced me to sit down and rest.  I worked on these quite a bit during my London trip!

Modern Baby Boy Nursery by Natalie Parker

Also hiding on one of the shelves is a clock (23).  I almost considered going Vegas-casino-style and not having a clock in the room at all.  In the end I thought it would be helpful to track feeding times.

On the wall near the clock is a Paris skyline canvas print (24).  The clouds are sewn on top of the canvas!

Modern Baby Boy Nursery by Natalie Parker

Finally, hiding on one of the shelves is a picture from our wedding (25).

That’s it!  I’m so happy with how it turned out!  I’m hoping that the style and all the storage will grow with him.

Sources

  1. Paint: Double Click and Snowy Pine by Behr
  2. Crib: Sniglar CribVyssa Vinka Mattress, Len Mattress Protector, Len White Fitted Sheet, by Ikea
  3. Bear: Wild Republic Black Bear on Amazon
  4. Glider/Recliner: Dutailier Minho Reclining Glider in Grey on Jet.com
  5. End Table: Franklin Storage Cabinet Triple Drawer at Target and Home Depot
  6. Trash Can: Threshold Split Finish Orb Wastebasket in Silver at Target
  7. Diaper Pail:  Ubbi Steel Diaper Pail in Grey on Diapers.com (sold in many other stores).
  8. Paris Metro Pillow: Inspired by this tutorial on A Beautiful Mess but printed directly on fabric instead of iron-on.  Fabric is Crafter’s Image Photo Fabric on Jet.com
  9. Rug: Division rug by CB2.  NOTE: they will do price adjustments if it goes on sale within 14 days from when it’s delivered.  You have to call customer service.
  10. Animal Drawer Pulls: Inspired by this tutorial from Apartment Therapy using this tub of safari animals from Toys R Us and painted with Krylon Premium Metallic spray paint in gold.  Secured using bolts and Gorilla Glue from Home Depot.  The glue is important — the animals and bolts would have spun without it.
  11. Drawer Liner: Contact Shelf Liner in Scribble Black at Target
  12. Constellation Wall: Inspired by this technique by Vintage Revivals and this constellation wall by Young House Love.  I used silver oil-based Sharpie Paint Pens.  These paint pens are widely sold, but I had to go to an art store to get the size and colors I wanted without having to buy a package.
  13. Constellation Book: The Stars by H.A. Rey ordered from my local bookseller but it can also be found on Amazon
  14. Built-in Shelf Parts: Four tall white Besta Frames, two short white Besta Frames, four white Hanviken doors, four sets of Besta hinges, twelve white Besta shelves, at Ikea.  2×4’s for the base, wood screws, baseboards, molding, paint, too many drywall anchors and screws to count, Simple Seal 9 oz. White Paint Projects Sealant (caulking without needing a caulking gun), all from Home Depot.
  15. Built-in Shelf Inspiration: Inspiration from A Kailo Chic Life and The Naptime Reader (minus the big TV part in the middle), using some caulking tips from BrittanyMakes (photos not available in post, see this pin).
  16. Elephant Bookend: Zuny Classic Series Elephant Tan Animal Bookend at Amazon
  17. Cabinet Bins: Besta Large and Small boxes, by Ikea
  18. Cabinet Hardware: Liberty Soft Brass Ava Cabinet Knobs at Home Depot
  19. Curtains: Nunnerfört curtains in navyTidpunkt curtain rod set, by Ikea (hemmed myself on the sewing machine)
  20. Camera: Nest Cam Indoor Security Camera
  21. Star Wars Cross Stitch: Empire Strikes Back Cross-Stitch pattern from knottybytes on Etsy.  Subtracted Boba Fett and added Obi-Wan from the New Hope pattern (edited Obi-Wan myself).
  22. Embroidery Hoop Framing: 5-inch Bamboo Embroidery Hoops at Michaels using this framing tutorial from Floss and Mischief.
  23. Clock: Threshold 6″ Brass Wall Clock at Target
  24. Paris Skyline Canvas Print: Paris Skyline Art Print Canvas by lauraamiss on Etsy
  25. Brass Pedestal Frame: Room Essentials Pedestal 4″ x 6″ Brass Frame at Target

How to Use Travel Insurance to Plan Pregnancy Travel

Travel Insurance for Pregnancy

You want to take a trip.  You’re pregnant.  Or you might be pregnant by then.  Does that mean you can’t plan any travel?

No!  Plan away!  But it’s time to learn about travel insurance.

This post is meant to cover the following situation:  I will be pregnant or may be pregnant during the trip.  I want to take the trip, but what if something happens healthwise before or I just don’t feel like taking the trip?  On the other hand, I may be fine so I want to plan on going unless something happens.

This post is not meant to cover insurance to help if something happens to you while you are on the trip pregnancy-wise.  There are policies out there that cover this, but I do not have personal experience with them.  Keep in mind that for many insurance policies it matters whether or not you were pregnant at the time you bought the policy.

Travel Insurance

Travel insurance sounds scary, but it can be a really useful tool.  It can be a bit tricky buying the right policy but it can be done!

Cancel for Any Reason Coverage

“Cancel for Any Reason” coverage means you can cancel the trip for any reason.  It’s more expensive than other travel insurance policies since it covers more, but it can protect you if you can’t or don’t want to travel when the time comes.

Most other policies may not cover you if you knew you were pregnant when you bought the policy or want to cancel the trip because you became pregnant.  Make sure the policy you are looking at is “Cancel for Any Reason” not just generic “Trip Cancellation.”  Pregnancy and childbirth are very often exceptions to general trip cancellation policies.

There is a Tight Deadline

Here’s the kicker: you have to act fast.  Once you make a purchase toward the trip, the clock starts.  This means a deposit, that first hotel reservation, plane tickets, whatever it is where you are spending actual money on the trip.

Each travel insurance company has different deadlines.  The most common I’ve seen is 14-21 days from the “date of first deposit” or the date you first buy something.  The longest I’ve seen is 30 days.  Do not miss this deadline.  I missed the 21-day deadline by hours for my trip to London because I did the math wrong.  I had to go with a company that had a 30-day window and it was more expensive.

How Much Will It Cost?

Lots of factors go into this including the age of the traveler and cost of the trip.  The good news is that most sites will give you a free quote once you punch in the details.

Here’s an example using RoamRight, which who I tend to use.  RoamRight is not paying me to post this and I’m not suggesting you go with them.  This is just an example!

On the homepage, enter in the details for your trip.  Below is an example for a trip for 2 with $5000 in nonrefundable costs.

Travel Insurance for Pregnancy

Three quotes are returned.  I usually go with Preferred because I have credit card and other insurance that covers other items I need.  I never buy Essential because it does not have an option for the Cancel for Any Reason upgrade.

Travel Insurance for Pregnancy

Note the prices quoted do not include the Cancel for Any Reason upgrade.  You have to click down and see the additional cost to add it.

Travel Insurance for Pregnancy

The total cost to insure my fictional trip is $368 ($230 plus the $138 Cancel for Any Reason upgrade).  Simply click through, enter your personal and payment information and you’re done!

Travel Insurance for Pregnancy

I get it, $368 isn’t a small amount of money.  To me the cost is worth it so I can plan trips without worrying that my pregnancy will put me out thousands in nonrefundable plane fares.  I’d also rather spend the money instead of not traveling at all during pregnancy.

Other Tips

I insure only the non-refundable portions of the trip.  It brings the cost of the insurance down.  There’s no reason to go through making an insurance claim on a refundable hotel reservation if I can simply call the hotel to cancel.

If the trip cost goes up, I call and adjust the policy.  I estimate how much coverage we need and buy the policy.  If the non-refundable part of the trip costs more than anticipated, I call the insurance company and adjust.

Please note I’m not an insurance agent and this is just my experience, not insurance advice.  You should do your own research into insurance policies before buying.

Travel Insurance for Pregnancy

Scrapbook Layout: 10th Wedding Anniversary

10th Anniversary Scrapbook Layout by Natalie Parker

The Story:  We celebrated a big one this year!! 1-0!

One scrapbook page for every anniversary:  We take a picture on each of our anniversaries and I turn it into a scrapbook layout and add it to the end of our wedding scrapbook.  I love how the scenery changes and we have changed over the years.

Guest book cards: As usual, I picked one “guest book card” that was signed by a wedding guest and included it on the page.  Read more about why we used guest book cards here.

More to scrapbook later: I have more pictures of our party and more thoughts that I will likely put into our 2016 scrapbook.  This page is to simply mark the year and matches all of its compadres in the Anniversary section (see below).

Previous Years:  Anniversaries 1-6, Anniversary 7, Anniversary 8, Anniversary 9.

Want to see my entire wedding scrapbook?  Check it out here.

10th Anniversary Scrapbook Layout by Natalie Parker

Fonts: Garamond | Tools: Epson Stylus R2000 (photo), Silhouette SD (headline) | Supplies: Epson Semigloss Photo Paper (photo), DCWV Silver & Pearl Shimmer Stock, SEI White Elegance (paper) | Keepsakes Included: guest book card.

Pregnant and Traveling: London Booked at 7 Months

Baby on Board London

I am traveling to London for business soon!  I wanted to go early in the pregnancy but it didn’t work out.  I’ll be taking off on a 10-hour flight just shy of 28 weeks (or 7 months along).  Given the choice between flying while really pregnant or having to go later and leave a baby behind, I’m choosing the former.

What can possibly be going through my head having scheduled this?  This:

Assuming I can until I can’t.  Just like with my trip to Australia, I’m assuming I can travel as normal unless my body or this baby tell me I can’t.  I easily could have not scheduled the trip not knowing how I would feel.  But what if the 28th week rolled around and I felt fine?

Carefully reviewing the rules.  Different airlines have different rules about how far into the pregnancy you can travel.  Some require a doctor’s note after a certain point.  My airline requires a note at 28 weeks.  While I don’t technically need one on the way there, I will carry one.  I recommend carrying one if you’re showing even if your entire trip will occur before the deadline — you never know what a gate agent will say.

Insuring the trip and making cancellable reservations.  All of my hotel reservations can be cancelled and refunded.  I’ve insured the parts that are coming out of my pocket and not the company’s.  Pregnancy is a tricky thing and not covered by all travel insurance policies, especially if you are pregnant at the time you make the reservations.  I’ve purchased a “cancel for any reason” policy which will allow me to stop the trip if I just don’t feel up to going.

Mr. P is coming along.  He’s not coming just because I’m pregnant, though I’m much happier to have him with me.  We try and travel together always, even if one of us is on business if we can swing it.  I’m glad he’ll be looking out for me!

Being aware of my health coverage options if something goes wrong.  Without getting into too much minutiae, I will be fine if I need medical care or emergency evacuation abroad.  I’ll make sure and know what to do and where to go if I need help.

Adjusting our leisure time.  We’ll have two weekends to ourselves.  In non-pregnant circumstances, we’d probably take two weekend trips as far as we could get.  We’re still taking a trip one of the weekends, but it’s a bit less ambitious.  Even if I’m a spry pregnant lady at that point, I’m sure I’ll be tired so it’s a good compromise.

How will it turn out?  I have no idea but I’m hopeful.  I’ll keep you in the loop!

Update: Read all about how the trip went here!

A pregnancy disclaimer:  I’m writing to share my experiences.  Your experiences, resources, and situation may be different.  My choices might not be the best choices for you.  I thank you in advance for trusting that all health decisions were discussed with my doctor and husband. 

Image courtesy Leon Brocard via Creative Commons license.